Jumping Robot
Introduction & Inspiration
My favorite project I've ever created so far. I devloped this project over the course of fall semester and winter break of my 2nd year in community college. The main inspiration for this project is from my favorite game of all time, Rainbow Six Siege. In that game, there are two sides, attackers and defenders. Before the start of every round attackers are allowed to scope out the map and find the site where defenders are located. To do this, they have access to a two-wheeled jumping drone with a camera embedded into it. My project has the exact same functions, and like the game, can be controlled by a phone.
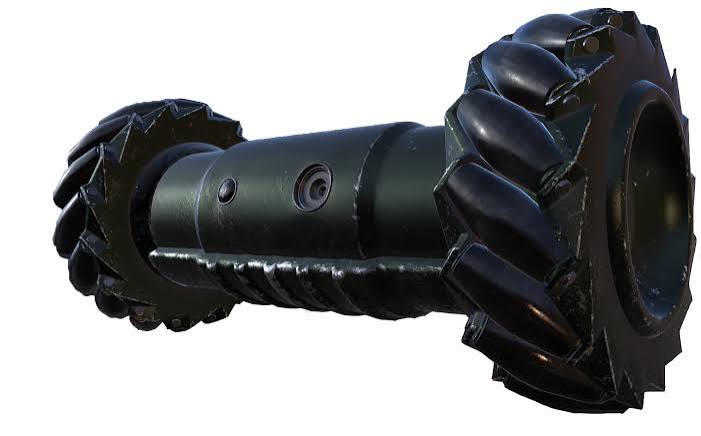
The Mechanism
The main mechanism to drive the robot is similar to that of an airsoft gun:
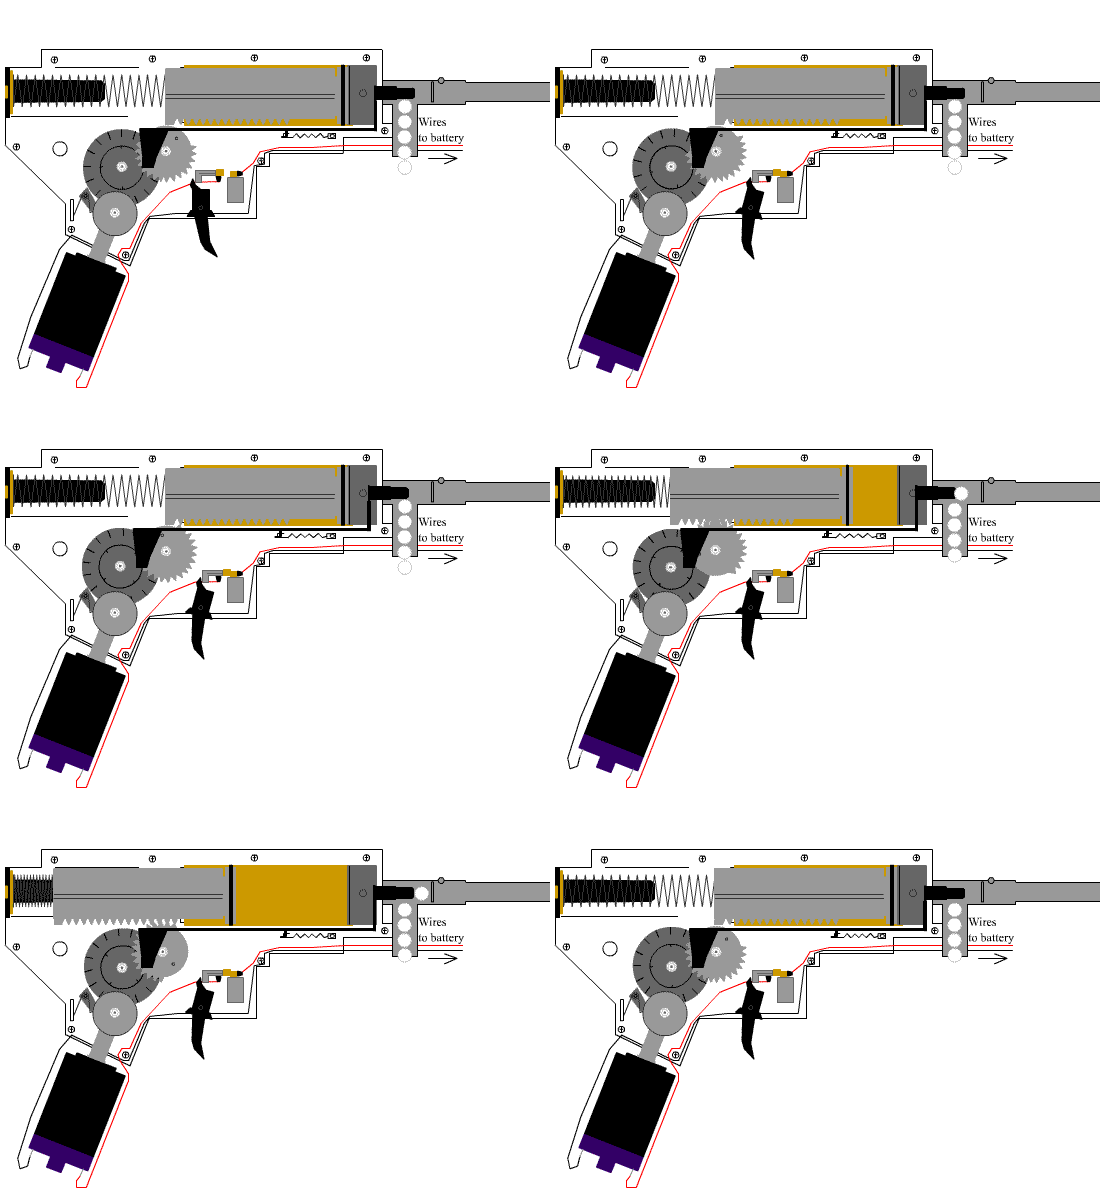
As you can see there is a mutilated gear, rack, spring, motor, and gear train. The motor drives the gear train, which drives the mutilated gear, allowing the rack to move back and compress the spring, up until the mutilated gear reaches its part with no teeth, the spring will now be released, pushing the airsoft pellets out. My robot has the same exact parts and works the same exact way, except there are two springs and instead of launching airsoft bullets, it's launching itself! I did not come up with this idea, to make a robot launch itself into the air using the same mechanics of an airsoft gun. This project was only possible through the youtuber, Basement Creations his jumping robot project was my main inpiration, I used his 3D design as my main reference when designing the mechanical parts of my project. So big thank you and shoutout to him!
Electronics
Here are the main electronic components used for this project:
- XIAO ESP32-S3 Sense w/ Camera
- MG996R Servo
- 800mAh 7.4V 2S Lipo Battery
- N20 Gear Motors
- DRV8833 Motor Driver
- MP1584EN 5V Buck Convertor
- Songle SRS-05VDC-SL Relay Switch
I created the main controller board using perfboard allowing me to solder all the components together on a small compact board. The main star of the show is the ESP32-S3 Sense with its camera board attached to it. This allowed me to recreate the same experience an attacking operator would have. As the microcontroller is an ESP32, it allowed for seamless wireless communication between the phone and robot. The main motor that drove the entire gear system was the MG996R servo motor. I modded the servo so that it just acted as a motor that can be switched on or off by removing the control board inside the servo and connecting power wires directly to the motors.
Software
The majority of the web controller was heavily assisted with AI to be completely transparent, particularly the HTML and CSS. However the main base of the code is quite simple, it uses the basic ESP32-CAM camera code found on the Arduino IDE. The look and features (joystick control, jump button, speed sliders, etc.) were my choices as I wanted it to truly feel like using a real version of the drone from the game. My favorite feature of the software is the fact that the ESP32 does not have to be connected to an existing wifi network, but rather it creates it's own wifi that a phone or any smart device can connect to. This allows the robot to be controlled anywhere regardless of the enviornment. I took this project to my community college and was able to show it off to friends and professors, which was only possible with this feature.
Biggest Problems Faced and How I Solved Them
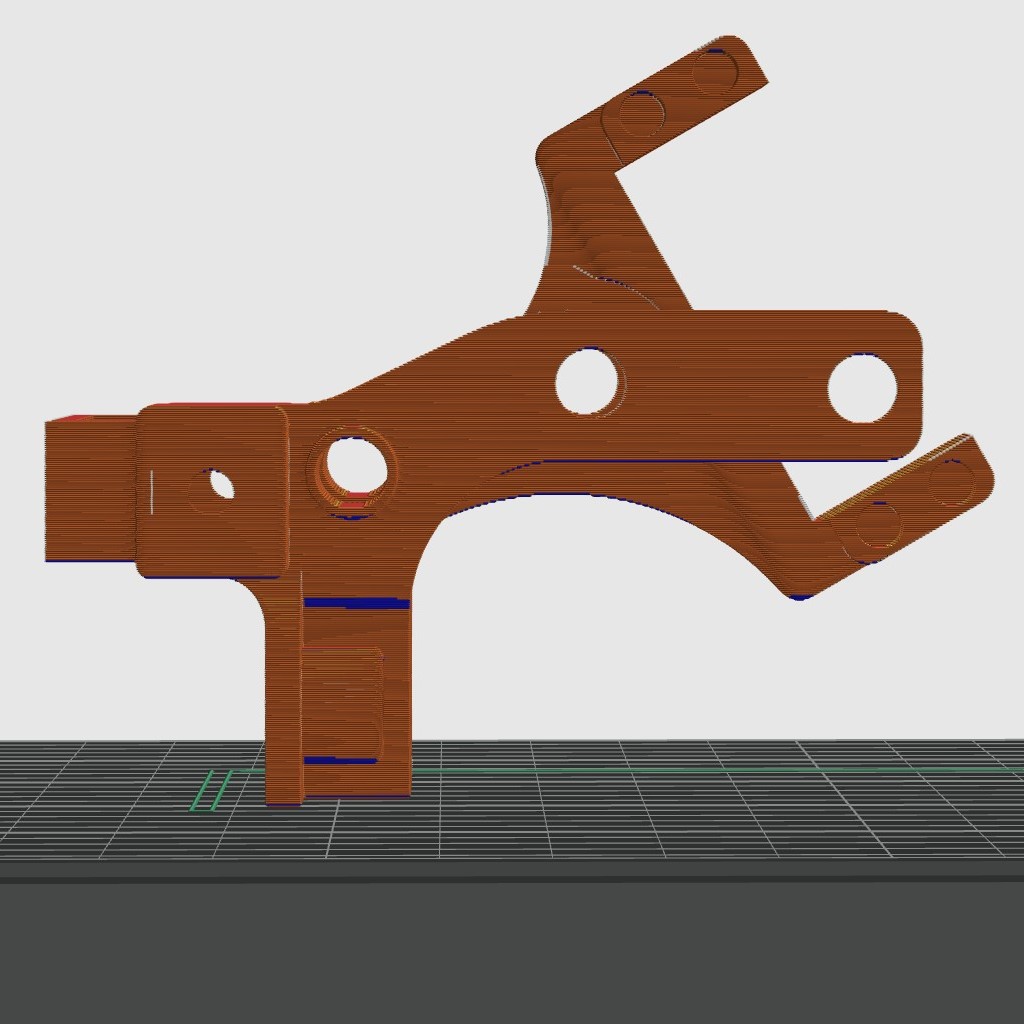
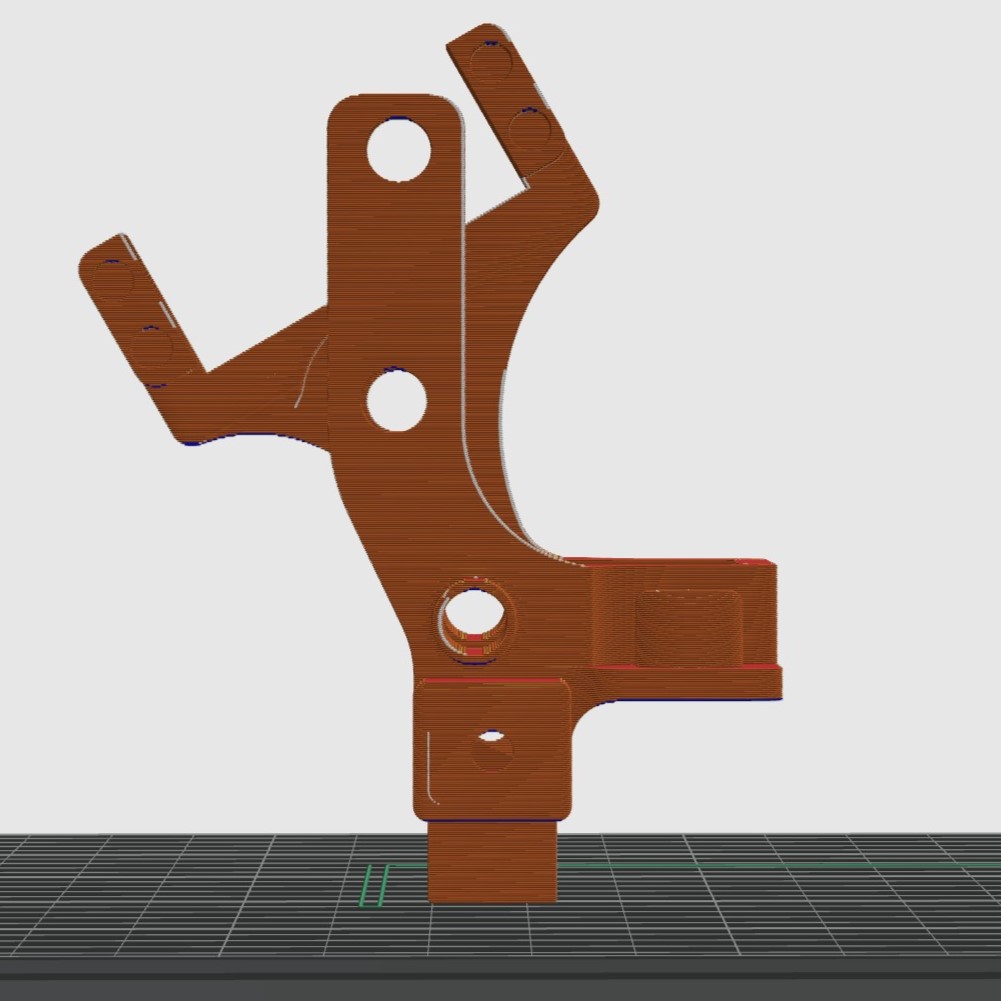
The gear and motor holder kept breaking as it couldn't handle the force of the springs after being released. The main culprit of this problem was the orientation of printing.
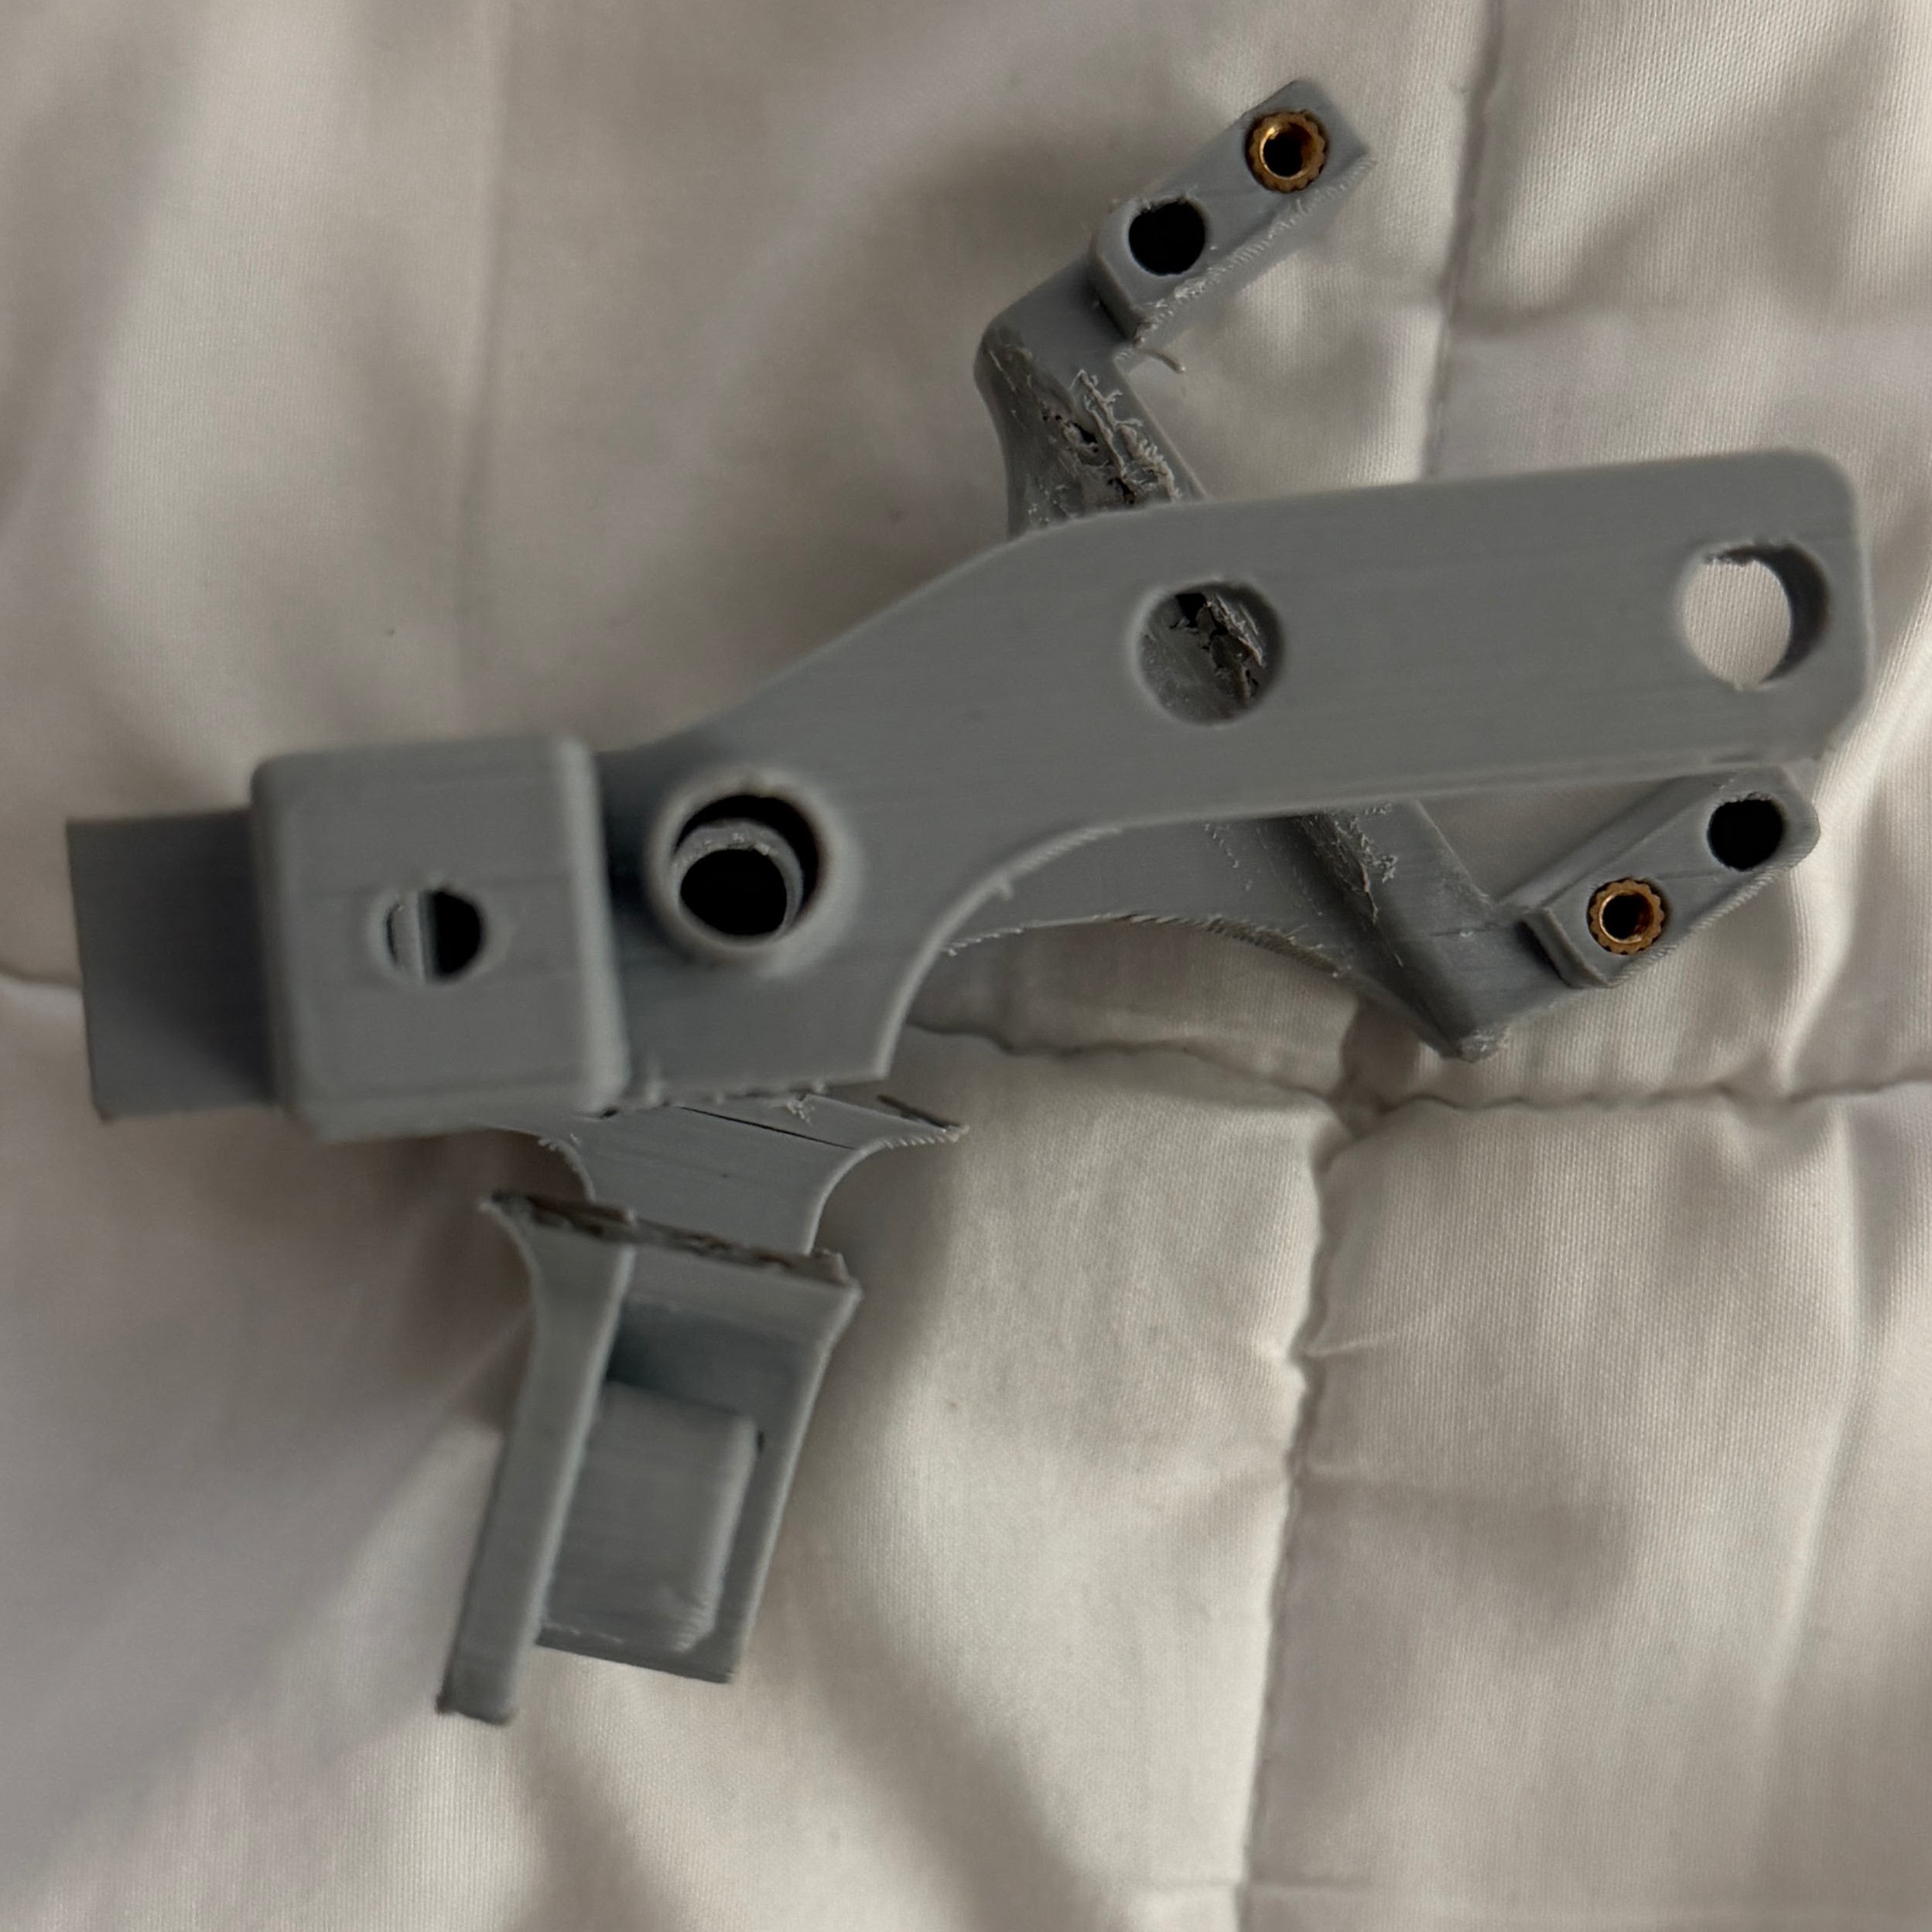
After changing the orientation of the print, the area where the full force of the springs was being hit, were now full layers stacked on top of each other, not the layer lines like in the original orientation.
Forming the aluminum linear guides. This is more of an assembley issue but solving it was crucial for the robot to work properly. Essentially I had to create holes in these hollow aluminum pipes so that smaller pipes could get fitted into them, this allowed the main robot to be held together without things like glue or adhesives, as well as act as linear guides for the spring to compress, without them the springs would not work properly. I didn't have the proper tools to drill into aluminum, so I improvised, I bought a small dremel and drilled into the side just enough to start drilling a hole into it. This may seem like a small problem, but if I couldn't solve this assembley problem the project would not have been possible.
Results
Here's a quick demo of the robot being controlled and jumping:
The max height the robot reached was 14.3 cm. This was without the electronics though, I believe this can be obtainable (and farther) with the electronics by changing the trajectory of the launch, using lighter components, and having stronger airsoft springs.